Vibe coding is the buzzword of the moment, and for good reason , AI tools have given product designers a massive new superpower. They have turned us all into “makers.” In this article, I’ll show how I vibe coded two different projects: a floating UI cooking app and an XR basketball game.

While Figma put vibe coding on the map for designers, this approach goes far beyond just one tool. There is an army of incredible tools serving different purposes: design-focused tools like Stitch; prototyping engines like Vercel, Lovable, Google AI Studio, and production-ready environments like Antigravity or Cursor. It’s worth mentioning that even the ones I categorize as prototyping can send its code to GitHub which add a new step towards production-ready code.
After “vibe coding” mobile and web app prototypes for a while, I realized these tools should be able to handle XR 3D canvases as well. This led to a thought… can they also prototype XR experiences?
The technology is certainly there. WebXR is the standard API for immersive experiences on the web, and frameworks like A-Frame provide ready-to-use XR components, covering inputs, primitives, teleportation, gestures and so on. Since AI coding tools can already interact with external libraries, I realized I only needed to provide the intent and guide the AI toward the spatial outcome I wanted.
So, that’s exactly what I did. And it worked. Suddenly, I could tell the AI what I wanted, and it created a 3D canvas with a head-tracked camera, hand controllers, and functional interactions. This is the beginning of spatial vibe coding!
My approach to Spatial Vibe Coding
In practice, vibe coding for immersive experiences is similar to vibe coding for mobile or desktop, but with an added dimension.
While you don’t need to be a developer to make functional prototypes, the more you know about the tech stack, the more control you have. Pure vibe coding , focusing solely on intent without thinking about the “how” , is valid and often the best way to avoid biasing the AI. If you give the agent freedom, it often finds the most efficient path. Conversely, if you try to micromanage it, you end up with “two brains” working against each other on the same task.
However, understanding the tools allows you to speak the same language as the AI, increasing speed and precision. For example, A-Frame has a specific component called hand-tracking-controls. If you tell the AI to use this specific component, it generates a standardized, ready-to-use solution that creates fewer problems than a custom solution.
My recommendation? Focus on intent, but establish “rules” based on the components you know work best.
The prompting strategy: Freedom vs Bias
When it comes to technically complex projects, I prefer to let the main AI agent figure out the solution rather than asking a second AI to polish or “engineer” my prompt.
In my experience, when another AI takes my rough prompt and “polishes” it, it introduces a biases. It often guides the final coding agent in a direction it wouldn’t have naturally taken, leading to worse results. I get better outcomes when I either tell the AI to refine the prompt without dictating how to solve it, or simply go with my original, intent-based prompt.
The “intent-based” prompt (successful in this example)
Here is the original prompt I created. It focused on the what, not the minute details of the how:
“I want you to create an MR cooking app. The app should provide a passthrough experience with a UI panel rendered inside it. When the app is published and the URL is opened in a VR headset such as Meta Quest 2 or 3, the user should see the standard Open in VR button in the browser. After clicking it, the user can enter the experience.
Use WebXR and A-Frame. I will be referencing A-Frame components and primitives frequently, so make sure to use native A-Frame primitives where possible.
Ensure that the UI is rendered within the MR experience. Place the UI panel to the left of the user and slightly tilted toward the user’s camera. For now, include placeholder elements in the panel: a title, an image, and some text.
The input system should be hand tracking, using the A-Frame raycaster component. Prepare a structure to group all UI elements, as the app will include multiple screens and navigation. Build the UI using A-Frame primitives.”
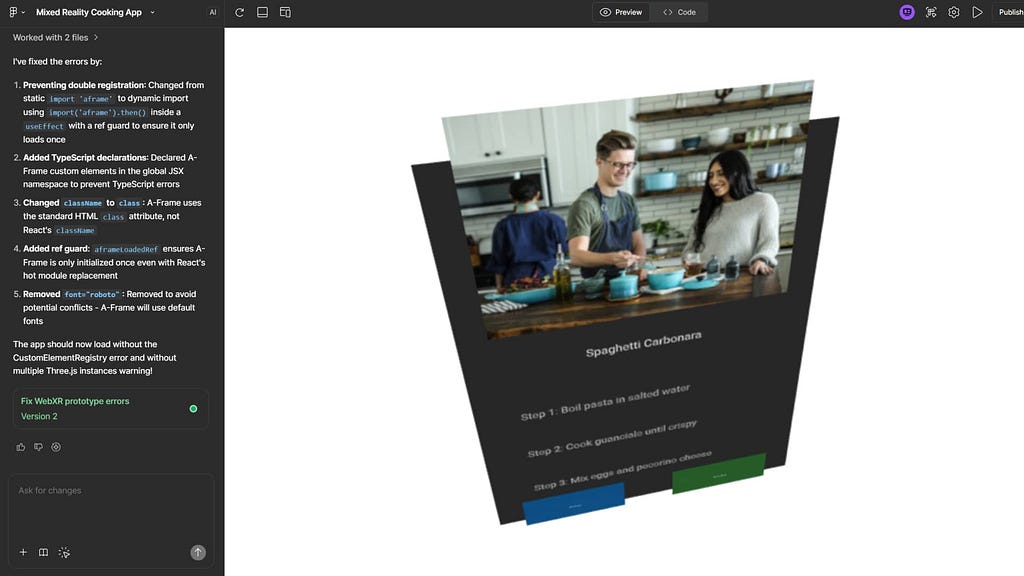
The Result: I got a functional 3D canvas, an input system, passthrough, and a UI in place. It wasn’t polished, but it was a solid baseline for iteration.
The “over-engineered” prompt (failed in this example)
I then tried using an AI to “professionalize” the prompt. This version was too prescriptive:
“Create a functional WebXR prototype for a Mixed Reality (MR) cooking app using the A-Frame framework.
1. Scene & Environment Setup:
Initialize an <a-scene> configured for AR/MR passthrough. Ensure the background is transparent (<a-sky> removed or transparent) so the user sees the real world. Ensure the WebXR button is enabled by default so the user can click “Enter VR/AR” on Meta Quest 2/3 browsers.
2. Camera & Input:
Set up a camera rig with a position of 0 1.6 0. Implement Hand Tracking controls. Add <a-entity> components for both left and right hands using the hand-tracking-controls component. Attach a raycaster to the hands (configured to interact with UI objects) so the user can point and pinch/select elements.
3. UI Architecture:
Create a parent <a-entity> to act as a “Screen Container” to group all UI elements. This will allow for easy visibility toggling for future navigation. Placement: Position this UI group to the left of the user (approx x: -1, z: -1.5) and rotate it on the Y-axis (approx rotation=”0 45 0″) so it is tilted to face the user’s camera.
4. UI Design (A-Frame Primitives):
Inside the UI group, build a panel using an <a-plane> as the background (dark color, slight opacity). Add an <a-image> placeholder for a recipe title image. Add <a-text> for the recipe title and instruction placeholders. Ensure all UI elements are children of the parent group and are rendered properly in the MR view.”
The Result: This prompt guided the AI agent too much. It ended up strictly following instructions rather than finding a cohesive solution, which led to broken code. It’s like micromanaging a graphic designer, if you tell them exactly where to put every pixel, you won’t get their best work.
Iterating on the design
Once the foundations were defined, I decided to push the fidelity. I noticed some errors in my initial brief, specifically, trying to build complex UI with primitives. I realized it was better to design a high-fidelity UI in Figma, export it as a PNG, and import it into the experience. While tools like Figma Make struggled slightly with the point-and-pinch input system, it was enough to visualize what the production version could look like.

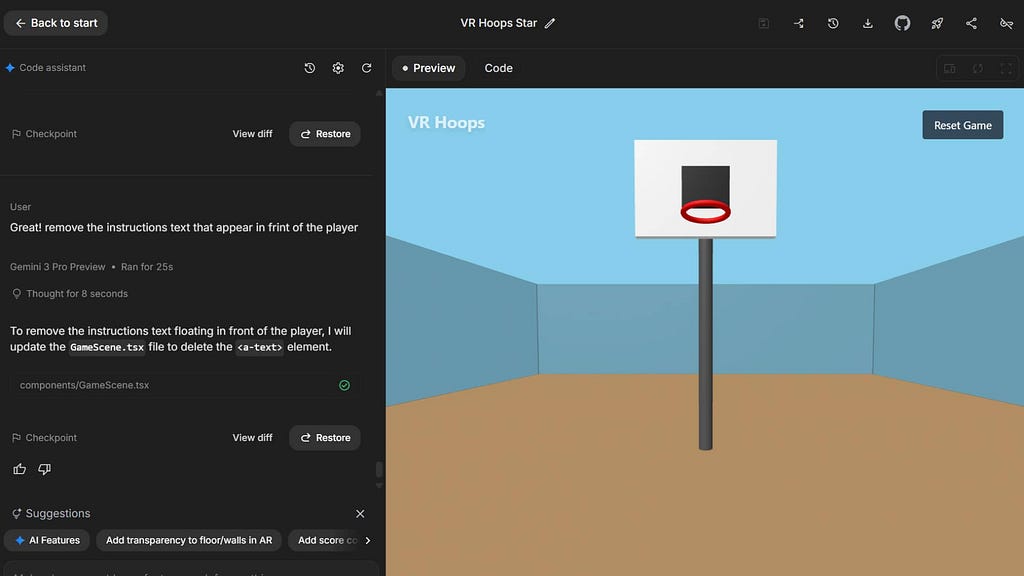
Going further: complex interactions with Gemini 3 Pro

To push beyond UI panels, I went with Gemini Pro in Google AI Studio.
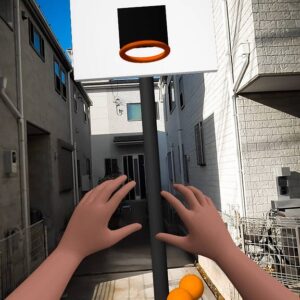
This demonstrated that a 15-minute prompting session can result in a fully functional WebXR prototype featuring physics, grabbing mechanics, and game logic. The generated physics are amazing, they feel very smooth and real.
While this method requires deployment via Cloud Run (rather than a simple “publish” button), the setup only takes two minutes. The outcome is a prototype that works in both VR and AR, creating a seamless transition between worlds. From this point, adding counters, sound effects, or textures is just a matter of conversation.

✨ Adding a touch of Nano Banana magic! By upgrading to a high-fidelity visual, we can deliver a more convincing and impactful pitch.

These are early experiments, but they demonstrate how accessible Spatial Vibe Coding is becoming. I am eager to test this approach with even more powerful tools like Antigravity, which, combined with the newest Blender or Unity MCPs (Model Context Protocols), will open the door to production-ready code, not just prototypes.
The most important takeaway is not how far the tools can go, but how far I can go as a non-developer. I can now conceive an XR game or app idea, design it, and prototype it entirely on my own. The barrier to entry for creating immersive realities has never been lower.
Thank you for reading, please feel free to drop a comment or open a discussion. I’d love to hear from you!
Spatial vibe coding: prototyping immersive reality with AI was originally published in UX Collective on Medium, where people are continuing the conversation by highlighting and responding to this story.